Most of us need to plait a horse or pony’s mane at some stage — and the more you do it the better (and quicker) you get at pulling off perfect plaits.
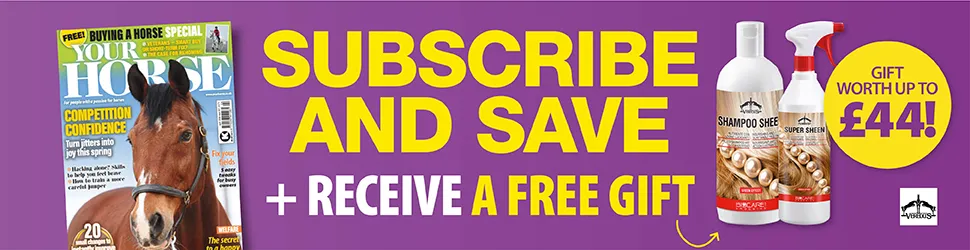
There are several essential plaiting items you need to have in your grooming kit, including a mane comb and brush, a sponge, and needle and plaiting thread or elastic plaiting bands.
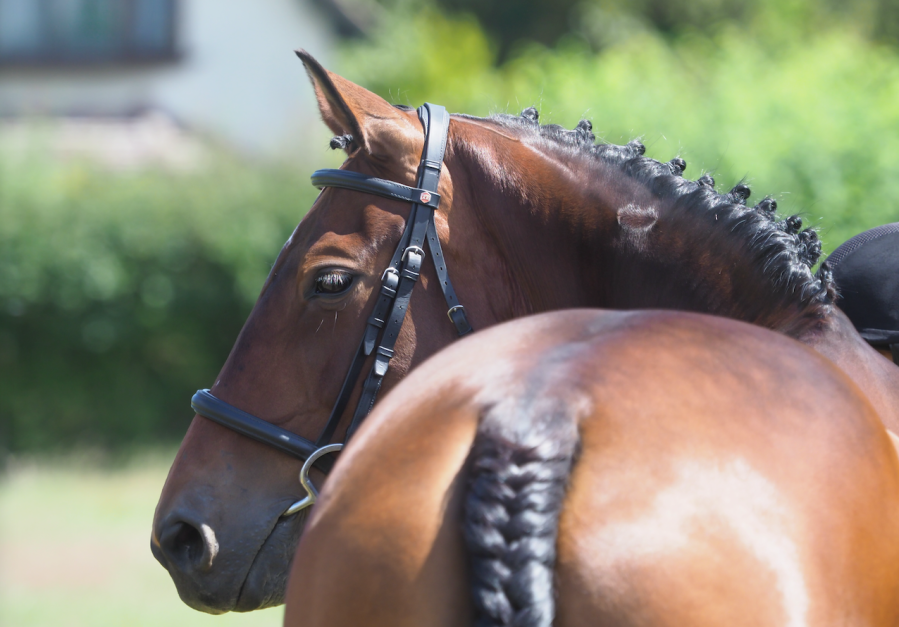
“Before you start plaiting, take a few moments to assess your horse’s neck conformation. How many plaits you have and how you position them can enhance the appearance of their neck and topline,” says showing star Katie Jerram-Hunnable.
“If they have a poor topline, position the plaits so they sit on top of the neck, rather than flat to the neck, to give the illusion of more topline. Horses with a well-developed topline suit plaits sitting neatly, flat to the neck.”
How many plaits?
You need to decide how many plaits you will put in your horse’s mane. As a general rule, if you horse has a long neck, go for fewer bigger plaits; if they have a short neck, go for more smaller plaits. This has the affect of making the neck appear shorter or longer respectively.
“Traditionally, the total number of plaits is kept to an even number (including the forelock),” explains Katie.
“Once you’ve decided how many plaits you’re going to do, brush the mane to ensure it’s tangle free and then dampen the hair on the top and underside.
“Comb it through and you’re ready to start dividing the mane up for plaiting. Use the comb to accurately measure the width of each plait. This will help to ensure that all of your plaits are equally spaced out.”
Video: how to plait a horse’s mane
The following video from Your Horse illustrates professional groom Jenny Ellis’s step-by-step guide to plaiting a horse’s mane:
How to plait using bands or thread
Expert groom Jenny Ellis shares her step-by-step guide for plaiting a horse’s mane with plaiting bands or thread:
1. Tidy up the mane
If your horse’s mane is long or thick, it’ll be harder to pull neatly, so consider whether it needs pulling, trimming shorter or thinning out. Take just a few hairs at a time and keep checking it’s even. It’s usually easier to plait a slightly longer mane, so beware pulling it too short.
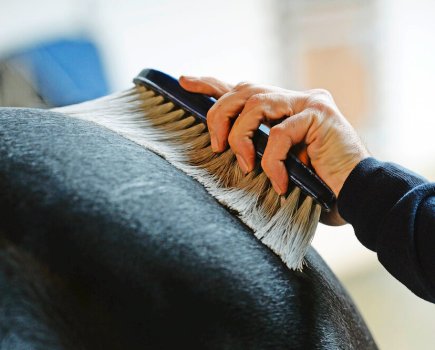
2. Remove any tangles
Comb through the mane to make sure it is tangle-free. You should then go over it with a damp sponge or plaiting (hay) spray in order to smooth out the hairs. This makes them easier to plait.
3. Section the mane
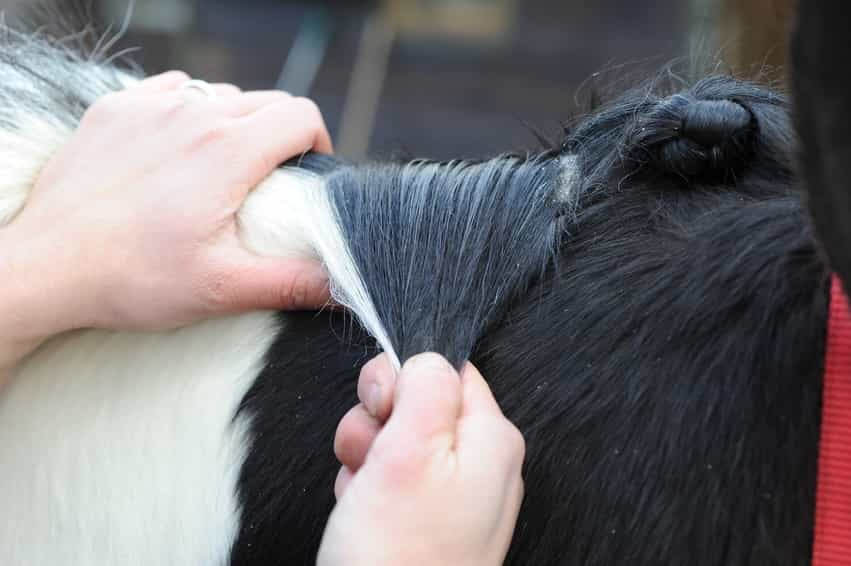
Decide how many plaits you want in the mane and then section your horse’s mane into bunches, working from poll to wither.
It’s a good idea to separate into bunches first and use a hair clip or plaiting band to hold them in place, so that you can check they are even before you begin plaiting.
Now is the time to use a plaiting or hair spray, because it prevents wispy hairs sticking up around your plaits, which makes them look untidy.
Spray it directly on to the bunches of mane. The spray will hold all the hairs together and prevent wispy bits from poking through, as well as giving you extra grip when plaiting up.
Supreme Product’s Easy Plait is great for this, as is Nettex Plaiting Spray and Equimims Plaiting Liquid.
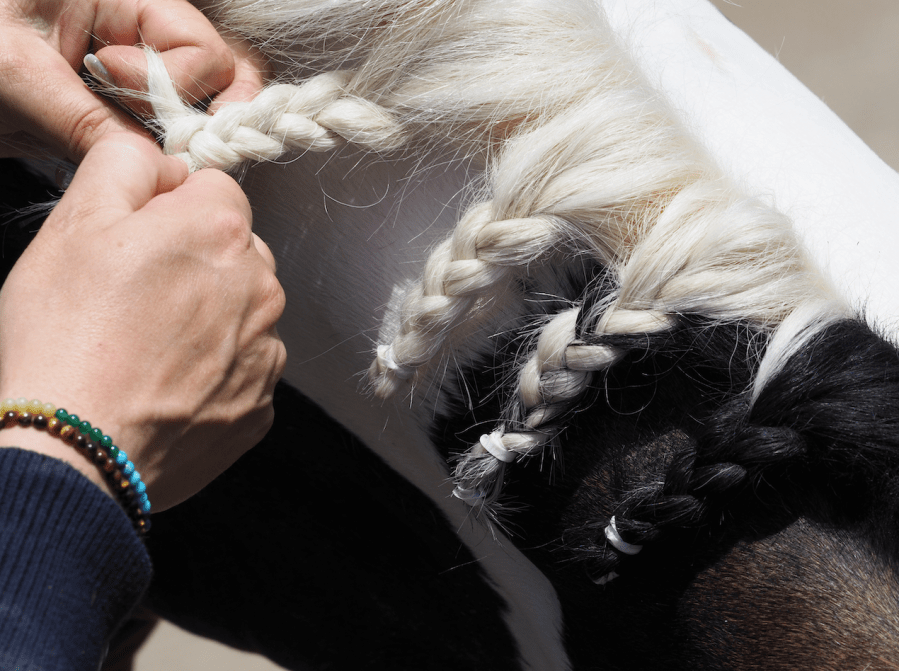
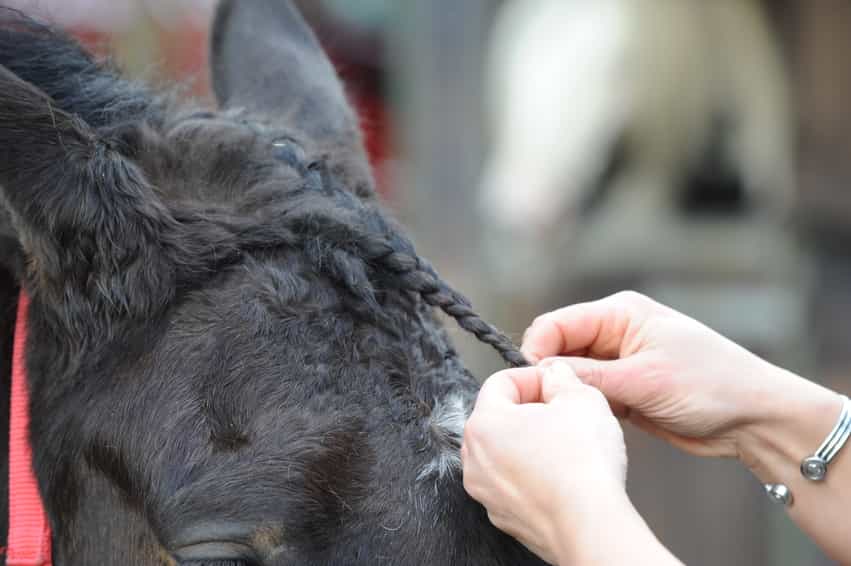
4. Start plaiting
When you are happy with the bunches, it’s time to start plaiting. Working from the horse’s poll, plait each section, keeping the base loose to avoid pinching your horse’s neck but making the length tight to keep it neat.
Make sure you hold the plait tight while you secure it with a plaiting band at the bottom.
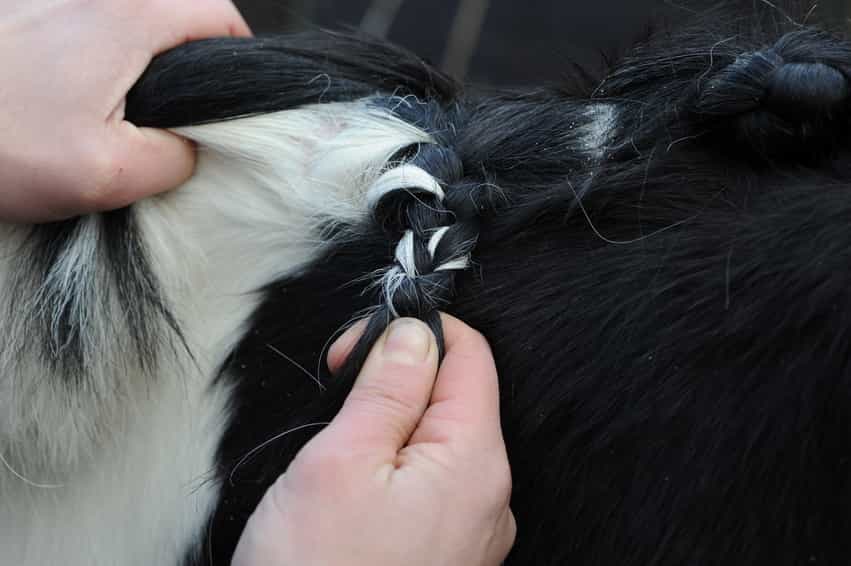
5. Secure the plaits in place
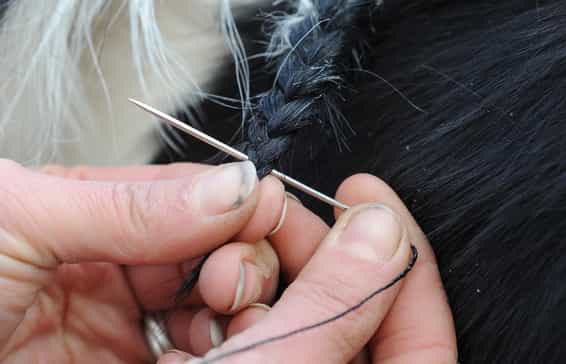
If you are using thread to secure your plaits rather than bands, now is the time to put your needle to work. Both a needle and thread or bands are totally acceptable, but the latter are certainly easier!
Once the plait is secure at the end, you need to roll it up into a ball. To roll up, fold each plait in half, then half again, and wrap the band around it repeatedly to secure — or use your needle and thread.
6. Fix the forelock
Forelock plaits can be done as French plaits, which looks really smart as it includes the very top of the forelock, or by simply plaiting the length of your horse’s hair.
Once plaited, roll it up into a ball in the same way you did for the rest of the mane.
It can be useful to have a helper at this stage to keep your horse’s head still. Otherwise, you may find you have a wonky forelock plait!
A lot of people choose to leave plaiting the forelock until you’ve arrived at a show.
It’s easier to brush out any hay from a loose forelock rather than picking it out of a plaited one — and some horses love nothing more than to give their heads a good rub on the haynet while travelling.
7 Final touches
Trim loose hairs and use a dash of hay spray or your choice of fixing product if necessary to finish the look.
Stand back and admire your handy work. It’s worth standing back and checking plaits as you go along too — just in case you find you’ve missed a bit of mane or the plaits have become uneven.
Top tips for plaiting a horse’s mane
- For long-lasting plaits, don’t wash your horse’s mane too close to show day. A few days’ worth of natural grease will make plaiting up much easier and helps hairs stay together.
- If your horse is short in the neck then a greater number of smaller plaits will help to accentuate the neck. If they are long in the neck, fewer larger plaits is best.
- Plait on show day if you can and take plaits out as soon as you can to keep your horse comfortable.
- Plaiting shouldn’t damage the hair, but be careful when you remove them and save plaiting bands for next time.
Develop a system that works for you
I have plaited numerous manes over the years. Predominantly on Thoroughbreds, but I learned on my New Forest pony (who hated standing still) before moving on to a Warmblood (who loved being fussed over and would stand for hours — much easier for plaiting a mane).
Here are the things I’ve learned to do (and not)…
- It’s easier to plait a longer mane rather than a short one, so don’t pull it immediately before a competition.
- Don’t apply mane conditioner as it makes the hair very slippery and tricky to hold.
- Have a helper on standby to hold your horse’s head still when you plait the forelock. A fidgety horse (or in my case pony) leads to a wonky plait.
- Keep a sponge in your plaiting kit and use it to dampen the mane before you plait. It makes it more manageable.
- Invest in a plaiting pouch. One that ties around your waist and holds all the items you need is ideal, as you can access what you need quickly and easily.
Look where you’re standing
A stool or similar to stand on while plaiting is really useful. It helps to be looking down at your horse’s mane when plaiting. I’ve stood on buckets in the past but it’s not foolproof as they’re not designed for it and can collapse (I say this from experience).
Some people use some sort of hairdresser’s hair clip to keep the rest of the mane out of the way. I normally use a mane comb. If the mane is long enough, you can push the teeth right through the hair and then gently twist it up so that it holds itself in place and the mane out of the way.
Everyone does things a little differently. The more plaiting you do, the quicker you will develop a system that works for you. I always separate the mane into sections using bands before I get started, for example, so that I can make sure I have an odd number of plaits that are of a similar size. Getting to the end and finding you’re left with just a few strands of mane to plait is infuriating!
Images ©️ Shutterstock and Your Horse Library/Kelsey Media Ltd