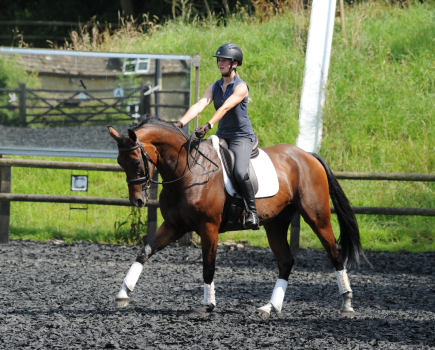
It’s easy to think that to jump successfully it’s essential to train regularly over a course of show jumps or a cross country course. This is true to some extent – horses need to know how to tackle a full course and deal with everything that throws up. However, when it comes to teaching your horse the technicalities of jumping, nothing beats gridwork. It builds trust in your partnership and develops control, and these two things combined mean that jumping a course clear should become easier.
Whether you’re a novice rider, have a young or inexperienced horse, or are both old hands at jumping, gridwork will help you to improve. Leading trainer John Thelwall shares five exercises you can try, whether you’ve jumped down hundreds of grids or are new to giving them a go.
The superpower in your toolkit
There are many benefits of riding over grids. You can start with very basic grids and work up, which is great for confidence. Courses ask questions, and the questions often come along quickly, which can be tough if you and/ or your horse are still learning. Thankfully you’ll find the answers to all of these questions in gridwork, which should be practised regularly as part of your horse’s schooling routine.
Gridwork can:
- Educate your horse on how to get out of trouble when things go wrong.
- Improve straightness.
- Help you ride more accurately.
- Lift your horse’s cadence.
- Build you and your horse’s confidence.
- Increase suppleness.
- Teach them to lengthen and shorten their stride.
- Improve balance and rhythm.
- Improve their shape.
Test them out
“Before you start gridwork, your horse must be able to pop over a single fence from canter,” says top trainer John Thelwall. “It doesn’t need to be big, a cross-pole is fine, but they do need to have the basics of jumping in place before facing a grid.”
John believes that the most useful benefit of gridwork is teaching your horse to get themselves out of trouble.
“If your horse gets too deep to a fence, they need to fathom out how to still tackle it,” says John. “If they need to be placed at the fence perfectly to have the confidence to jump, they’re not going to get too far. These exercises encourage them to think for themselves.”
Keeping straight is important, too.
“I build all my grids with straightness in mind. To lift themselves off their forehand and become lighter on their feet, your horse must be straight. My exercises show them that if they go straight, with their body following the line they’re taking, the task of jumping is made much easier.”
Exercise 1: Trotting poles
“With a new horse or rider new to gridwork I always start with six simple trotting poles on the ground,” says John. “This is easy for the horse, doesn’t ask too much of the rider, and builds confidence in both.”
Set it up: Lay out six ground poles with 5ft between each pole along the centre line of your arena.
How to ride it:
The most important thing is to use the poles to encourage your horse to lift their step for a better trot. Ride them forwards throughout, as if the poles aren’t there, keeping the contact and outline. Using poles will teach them that when you ask for more trot, it means height, not speed.
Keep asking them to go forwards as you exit the line and see how far you can keep up the quality of trot they offered over the poles. Control your rising to stay balanced.
Exercise 2: Canter poles
It’s now time to step up to canter.
Set it up: Change the six poles to a canter distance.
Distances are only a guide and can be adjusted slightly to suit your horse. ”For canter work I use a shorter distance of 2.7m per stride instead of the 3.7m used in building courses,” explains John. “I find this distance allows a backward-thinking horse to be encouraged to go forwards, and a forward-thinking horse can learn to contain themselves.”
How to ride it:
Ride over the poles in the same way as you did in trot – forward into the contact and asking for an improved quality of canter.
Be careful not to lean forwards and lift your seat over the poles. That may well make it easier for your horse, but because you use your seat to improve balance, rhythm and cadence, the desired results will be harder to achieve.
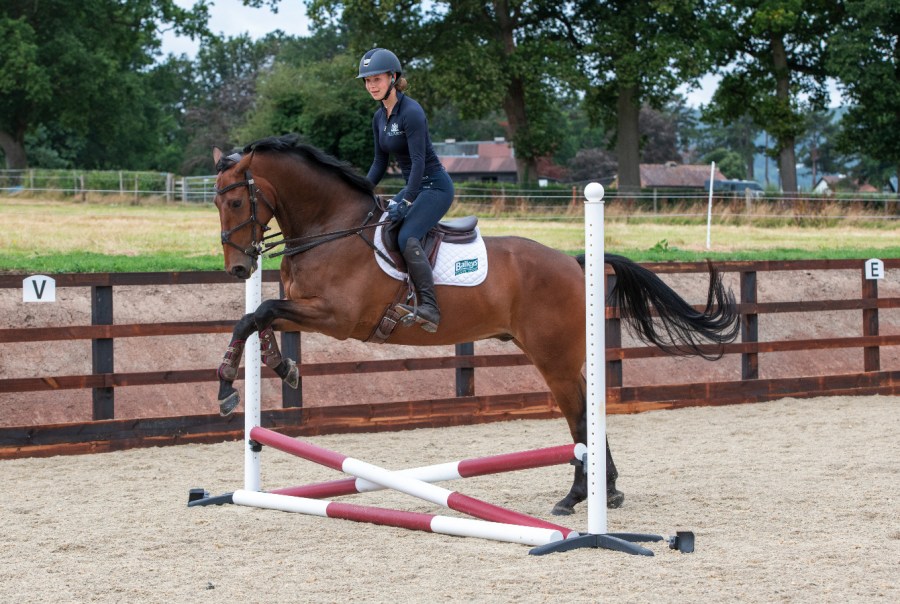
Exercise 3: Your first grid
“Although this grid may be simple, it’s one of the most effective for improving your horse’s technique and speed of reaction,” explains John.
Set it up: Lay out a trot pole first, followed by a cross-pole 7.5ft away. After this, lay out a canter pole 9ft away, and then 9ft on from this an oxer. See the diagram.
How to ride it:
- Build it up slowly, starting in trot with just the cross-pole and trot pole in place.
- Then add the canter pole and the front pole of the oxer.
- Once you’re both confident with this, add the back pole of the oxer.
- Stay in jumping position until you’ve landed over the oxer so you don’t accidentally bump down on their back.
The next step: Over a number of sessions, you can raise the cross-pole and oxer to a height where your horse needs to make an effort, but isn’t struggling. The cross-pole will encourage them to bend their back and make them quicker in front at the oxer.
If you wish, you can add V-poles at the oxer (show in green on the diagram) to help keep your horse straight.
Exercise 4: Raised canter poles
“This is a good exercise for a horse who tends to run at fences – a common issue with novices,” says John. “It teaches them to bring both hindlegs through, so that they’re taking off with them both equally underneath them. Once a horse feels how much power this gives them, they soon realise that they don’t need to run at the jump and throw themselves over it.”
Set it up: Start with six poles on the ground set at canter distance and two placed together at the end to make an oxer. Place a ground pole at the start.
How to ride it:
- Quietly canter through the grid a few times.
- When you feel your horse is ready, raise the poles one by one, starting with the oxer and working back from there. They don’t need to be high – just 9-12in from the ground.
- Try to stay still and balanced with the lightest of contacts, but if they need help understanding that they have to go slowly, you may have to take a hold. Don’t let your seat touch the saddle on your way down the grid – just stay even in your stirrups and let your horse find their own way through.
Exercise 5: Reverse raised canter poles
If your horse struggles to rebalance after a fence, this exercise will put them on the right track.
Set it up: Change the oxer in exercise 4 to a cross-pole, with a ground pole in front. This now becomes the start of the grid, so you’re riding it in reverse. Place a ground pole at the end too.
How to ride it:
- Canter down the grid, starting with the cross-pole end.
- The key is to let your horse find their own way over the first two elements, then sit up and ask them to slow down and rebalance themselves so that you exit the grid in a canter that’s good enough to approach another fence. That’s why this is excellent practise for jumping a course.
- Start with all of the poles on the ground and only raise them when you’re both ready. This might not be in your first training session.
- To slow your horse down, half-halt as they come up over each pole and release as they land. It takes a bit of practise to get the timing right, but once you have, the result is a much more balanced horse.
Meet the expert: John Thelwall is best known as an event rider, having competed at Badminton and Burghley in the 1980s. He is also an experienced racing jockey and show jumper. John now concentrates on coaching, encouraging riders to find a positive connection with their horse.
Receive six issues of Your Horse magazine for just £15!