Show horse producer, rider and trainer Jo Bates shows us how to plait a mane using the good old-fashioned sewing technique.
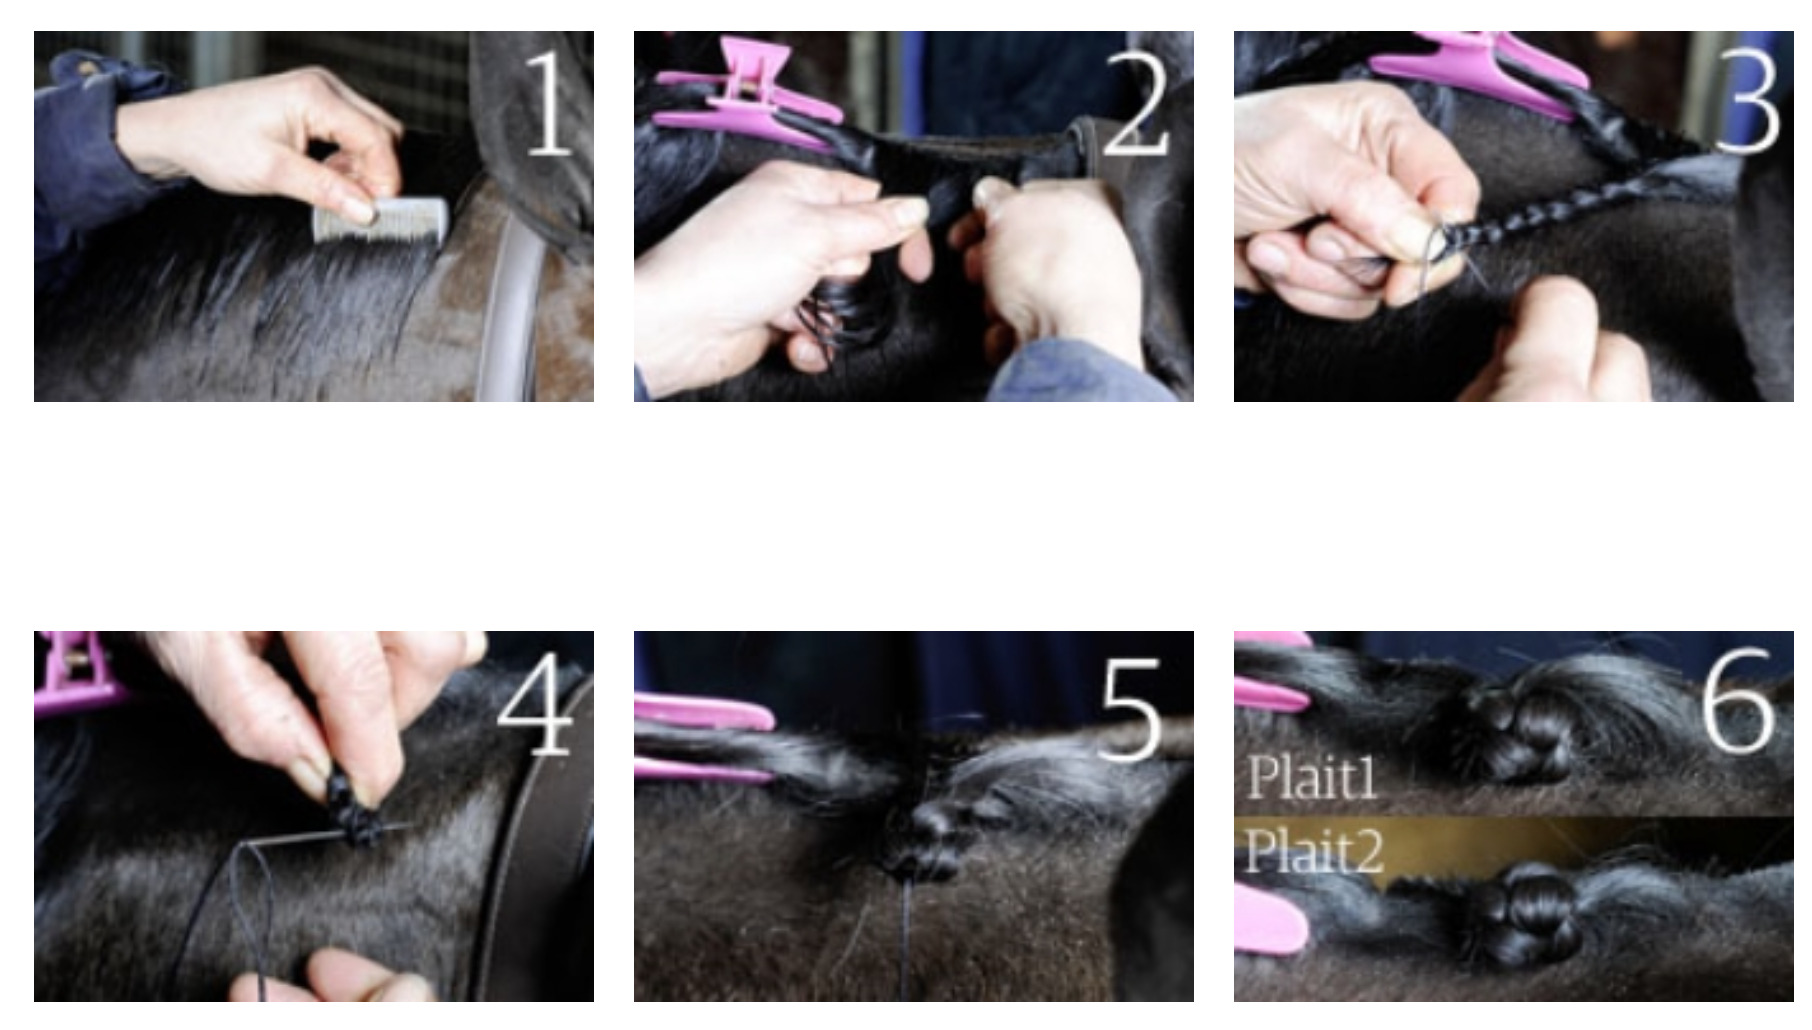 1. Wet the mane Start by wetting the mane and combing it through. I like to use Quic Braid from Exhibitor Labs, a non-sticky spray that gives extra grip and helps to stop the plaits coming out once secured. Using a dab of gel is also useful for keeping the plaits in place and any stray hairs at bay.
2. Work in sections Separate the mane into sections depending on the number of plaits you’ll need and start plaiting – be sure to pull the plaits as tight as you need to and keep a firm hold.
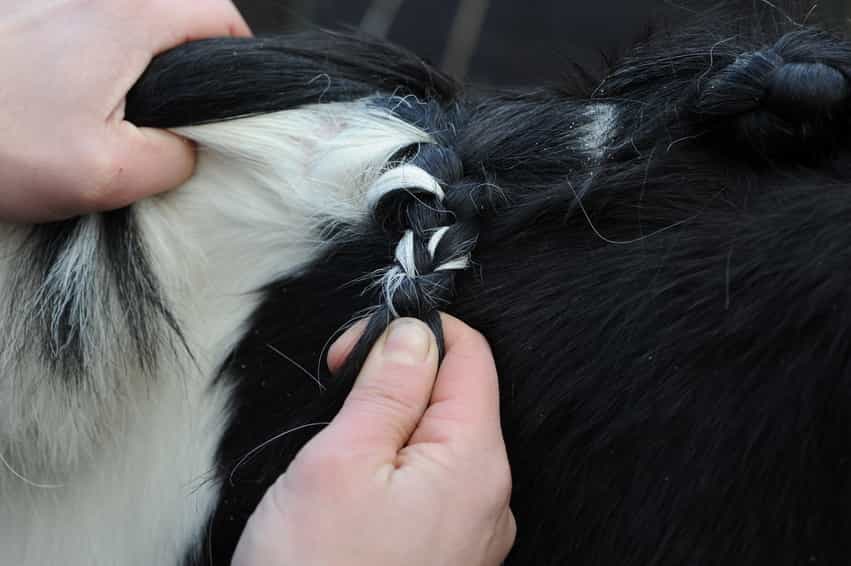
3. Securely does it With your needle and thread, push the needle through the middle of the plait at the end and wind the thread around. Repeat this process.
4. Tidy the ends To secure the plait, fold the end under and sew around it once more, pulling it tight.
5. Start sewing Fold the end of your plait under and up to the base of the mane, bringing the needle and thread up through the base. Then snake the needle down through the middle of the plait a few times until you reach the end.
6. Size matters Fold the plait under, in half, once more bringing the needle and thread up through the base. Tie the plait off on top of the plait to create a plait with a large base (plait 1) or bring the thread around the plait and secure to create a plait with a small base (plait 2).
Plaiting tips
You can use as many plaits as you like on your horse but traditionally, an ideal number is about 10 to 12. If he’s short in the neck then a greater number of smaller plaits will help to accentuate his neck.
Sewn plaits are neater and stronger than elastic band plaits and have more shape. However, rubber plaiting bands can be used as an acceptable quick and easy alternative and are often used in hunting.
Plaiting will not damage the hair, but be careful when you remove them.